
Reading time:
As part of Programmers’ Day celebration this year, Azoft web developers decided to surprise our fellow Azoft employees with a competition. To try something new and unusual, we created an internet-controlled robotic arm.
This was our first experience with robotics and it turned out a success. The robotic arm competition was lots of fun for everyone involved, so we decided to share our experience and post this robotics tutorial to give you a fast start into building robots for your own geek parties.
What does the robotic arm do?
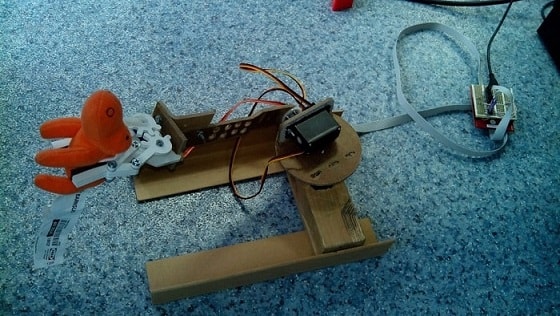
Our robotic arm is controlled via a web interface: it responds to remote commands and performs simple tasks. The scheme was the following: everyone working at Azoft company received an invitation to a web page from which they could control the robot remotely, try to perform a task, and watch their efforts and results through a web camera.
The tasks could vary: from drawing lots in a lottery to grabbing objects and collecting them in a basket — it’s up to your imagination. In our case, the goal was to grab a small object, move it to a different location, and drop into a container. Whoever collects the most objects within a small time frame wins. Sounds simple, but in practice it wasn’t as easy as you may think.
Have you decided what your robot will be doing? Good, now let’s turn to the implementation.
You will need
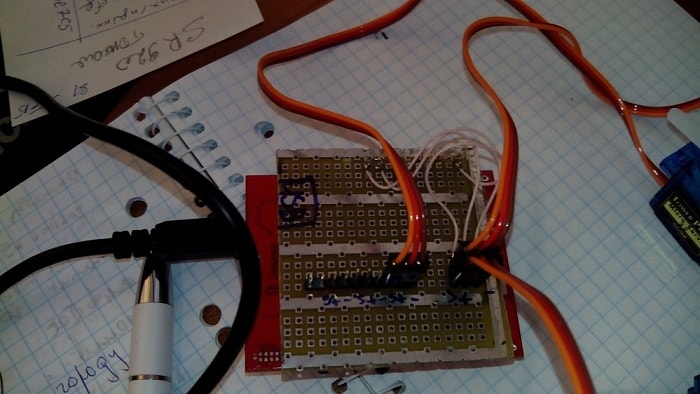
- microcontroller TI Stellaris Launchpad
- two servos (one for rotates, one for lifts) Hitec HS-322
- servo TowerPro SG90 for the hand
Let’s get started
The process consists of several stages
- 0. Material stage: Order servos and the microcontroller.
- 1. Hardware / Building stage: Construct the robot.
- 2. Software / Programming stage: Write and test the robot-side and server-side code.
- 3. Test stage: Test before the party starts.
Stage 0. Gathering the materials
Getting hold of all the necessary parts can take quite some time, since your nearest shop might not carry all the items you need. That’s why I recommend finding and ordering all the materials on ebay.com or aliexpress.com ahead of time.
Besides, it’s hard to find everything you need in one online store, so you’ll have to browse several websites. There are various online retailers out there, depending on where in the world you’re located. In our case, we ordered the parts on devicter.ru and hobbymarket.ru.
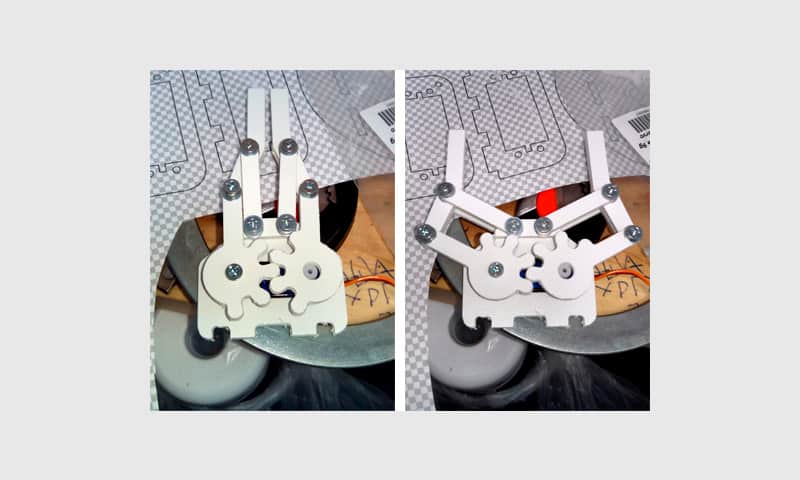
Stage 1. Hardware
Once you’ve got all the necessary materials, you can start assembling the main device – the hand. We tried to build it from MDF at first but the prototype didn’t survive the crash test. Our second try — from PVC — was a success.
Stage 2. Software
Programming
The software part was done with Energia IDE. At first, we programmed the hand to be able to move to 5 degrees from the original location. Later, we decided that the hand should receive position values and move to that location immediately.
Testing
There are tons of instruments to track bugs and find out where and what has gone wrong. For example, you could use the log file. RubyOnRails would reflect the debugging info automatically. Besides, you could add your own comments into the log file right from the code through the Ruby logger class.
Server side
After we have tested both mechanics and electronics only one thing was left to be done — the server side. Since the stages before were pretty simple, I didn’t share any code samples (but feel free to contact me and ask for the code, if needed). But the server side was really tough, so I’ll share our solution.
1. Authentication
First, a user is offered to authorize:
class HomeController < ApplicationController
 before_filter :need_auth
 def index
 define_mode
 end
end
Then, we authorize the user:
class UsersController < ApplicationController
 before_filter :check_request_method, :except => [ :sign_up, :logout ]

 def sign_up
 username = params[:username]
 password = params[:password]

 ldap_user = get_ldap_user(username, password)

 return do_respond(:wrong_credentials) if ldap_user.emptyempty?

 user = User.get_by_names ldap_user[:first_name], ldap_user[:last_name]

 unless user.nil?
 authorize_user user
 return render_need_email if ldap_user[:email].nil? and user.email.nil?
 return do_respond(:choose_queue)
 end

 user = User.new
 user.email = ldap_user[:email] unless ldap_user[:email].nil?
 user.first_name = ldap_user[:first_name]
 user.last_name = ldap_user[:last_name]

 if user.save
 authorize_user user
 return render_need_email if user.email.nil?
 return do_respond :choose_queue
 else
 return do_respond :wrong_credentials
 end
 end

 def update_email
 if request.method == 'GET'
 return render_sign_up
 end

 if params[:email].emptyempty?
 return render_need_email
 end

 email = params[:email]

 user = self.current_user

 return do_respond :wrong_credentials if user.nil?

 user.update_attribute('email', email)

 return do_respond :choose_queue
 end

 def logout
 session[:user] = nil

 respond_to do |f|
 f.html { redirect_to root_url }
 end
 end

 private
 def get_ldap_user(username, password)
 Net::LDAP.new(
 :host => 'example.com',
 :auth => { :method => :simple, :username => 'YOUR_LDAP_DOMAIN' + username, :password => password }
 )

 @ldap_user = {}

 if ldap.bind

 ldap_base = "cn=users,dc=test,dc=test,dc=com"
 ldap_filter = Net::LDAP::Filter.eq( "samaccountname", username )
 ldap.search(:base => ldap_base, :filter => ldap_filter, :return_result => true ) do |entry|
 @ldap_user[:first_name] = entry[:givenname][0] unless entry[:givenname].nil? and entry[:givenname][0].nil?
 @ldap_user[:last_name] = entry[:sn][0] unless entry[:sn].nil? and entry[:sn][0].nil?
 @ldap_user[:email] = entry[:mail][0] unless entry[:mail].nil? and entry[:mail][0].nil?
 end
 end

 @ldap_user
 end

 def check_request_method
 if request.method == 'GET'
 respond_to do |f|
 f.html { redirect_to get_out_and_come_in_correctly and return }
 end
 end
 end
end
2. Control access
This code is responsible for giving commands to the hand:
require 'fileutils'
class PlayController < ApplicationController
 #receive request from client (web-browser)
 def do_command
 # if current user can not play we send false response wich will be handled on client-side
 return false_json_response unless can_play?

 write_command(params)

 respond_to do |f|
 f.json { render :json => { :status => 'Ok' } } # it is not required to set anything in json block, you can pass just emptyempty hash like this: {}
 end
 end

 # check if user can still play
 # return true or false (what to do in each of these cases is your own deal)
 def check_can_play
 respond_to do |f|
 f.json { render :json => can_play? }
 end
 end

 private
 # this method sends command to the hand
 def write_command(params)
 # defining which of serves should be moved
 serva_num = params[:serva_num]
 command = params[:command].rjust(3, '0')

 # hand is device actually; we are going to write into it like into file
 device = '/dev/ttyACM0'

 File.open(device, 'w') { |f| f.write(serva_num + command + "\n") }
 end
end
Next, the challenge: at a certain period of time only one user should be able to access the robot control function. The hardest part was to determine the period of time during which a next user could be granted access to the controls:
class ApplicationController < ActionController::Base
 protect_from_forgery

 def current_user
 return session[:user]
 end

 # check if current user signed in
 def signed_in?
 !self.current_user.nil?
 end

 # check if current user is admin
 def is_admin?
 signed_in? and current_user.role == User::ROLE_ADMIN
 end

 # check if it is time to play for current user
 def its_time?
 is_queued = false
 queues = UserQueue.all

 now = ((Time.now + Time.now.gmt_offset).utc.to_f * 1000).to_i

 queues.each do |queue|
 time_start = (queue.time_start.to_f * 1000).to_i
 time_end = (queue.time_end.to_f * 1000).to_i

 if !queue.user.nil? and queue.user.id == self.current_user.id and (time_start..time_end).include?(now)
 is_queued = true
 break
 end
 end

 is_queued
 end

 # check if current user still can play
 def can_play?
 return true if is_admin?
 return true if its_time?
 false
 end

 helper_method :current_user, :signed_in?, :is_admin?, :its_time?
end
Robotic arm testing
Once the programmable robot arm was built and the code written, we moved on to testing. Ruby debugger allows us to stop the code execution anytime, fix the error, and then continue. From console you can check the domain, make changes and save them to a database.
Ready, Set, Go!
On September 13th (the day of our Programmers’ Day party) our robot faced the challenge of more than 40 runs. It broke down once, but was quickly fixed within a couple of minutes, so that small accident didn’t spoil the fun. We wish you an easy start in your robotics adventures. Good luck and have fun!


Comments