Mobile Device Management Solution: How It Should Be Done

IT copywriter
Reading time:
When you need a test device for work, it always disappears. It’s likely for the same reason that toast always lands with the buttered side down. All you have left to do is to look for the device, spending your time and nerves. At Azoft we used to do just that until we developed a mobile device management solution.
Let’s rewind a bit and go through the whole story.
Stage #1. Sysadmin is the boss
We thought, who can track mobile devices better than our sysadmin — a very organized and serious person. We gave him all the test devices. However, he was so busy with daily tasks that he couldn’t follow when and who took a specific device. The experiment had failed.
Stage #2. Devices mean apps. Apps mean developers
What if we link mobile devices to developers? Apple — to iOS developers. Android devices — to Android developers. Fail again. The same reason as above. Developers have so many things to do that they cannot keep an eye on phones and tablets.
Stage #3. OK, Google
We create a document in Google Docs and asked all the employees to note which devices they take. The scheme worked — colleagues marked devices including type and date when they returned it. But time after time we relaxed and began to skimp on the notes.
Stage #4. Report board
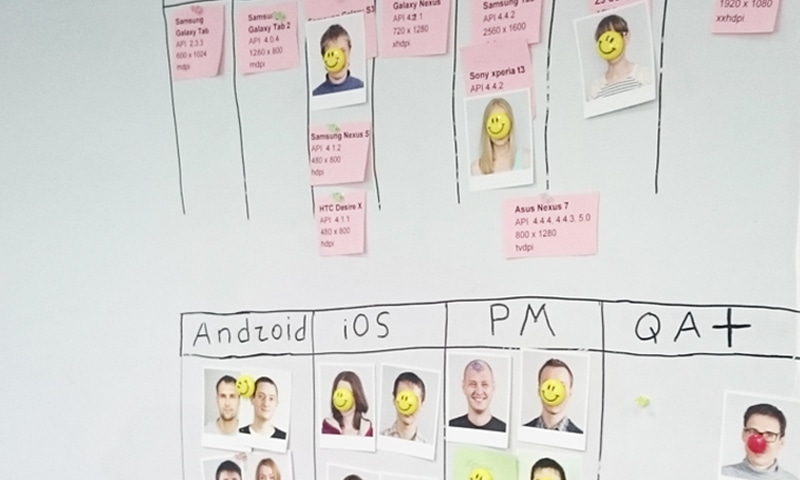
After all of our efforts, we placed a board that looked like a kanban board in the Android developers’ room. We placed cards with device and employee names on the board. When somebody took a specific device, she placed the device card on the card with her name.
We supposed the report board would be a temporary solution, but it worked well for more than half a year.
Stage #5. The device management solution
We liked the report board, but we love to automate business processes more. Therefore we came to the idea of a device management solution. The device has 4 main components: an administrative panel, backend, a web app, and a mobile app.
- The administrative panel was written using new Angular 4 released in March 2017. Admins can edit lists of devices and company’s departments — create, update, and remove.
- The web app was written with React. Users can register and check the device availability via the web app.
- The cross-platform mobile app made with NativeScript allows users to assign devices to themselves.
- Backend is based on NodeJS.
How to take a device? First, authorize in the service and find the required phone or tablet. Then tap the button “Take”. After that, you’ll see a personal QR code. Scan it with the chosen device and enjoy.
The second way is shorter. You don’t need to scroll through the screen till you find the card with the required device. Instead, tap the username in the header and scan the personal QR code.
The third way: print your personal QR code and put it somewhere on your workplace. In this case, you can always scan this code with different testing devices even without running the mobile device management solution. The information will be in the program every time you scan the code.
The most convenient thing about the service is links for project builds. Users can take a device, change the page with builds and choose the app for testing.
We launched the mobile device management service a couple of weeks ago and are very delighted. It works for our office mobile devices and helps all the team to cope with our goldfish memory regarding test devices. Thanks to our developers! Well done!


Comments